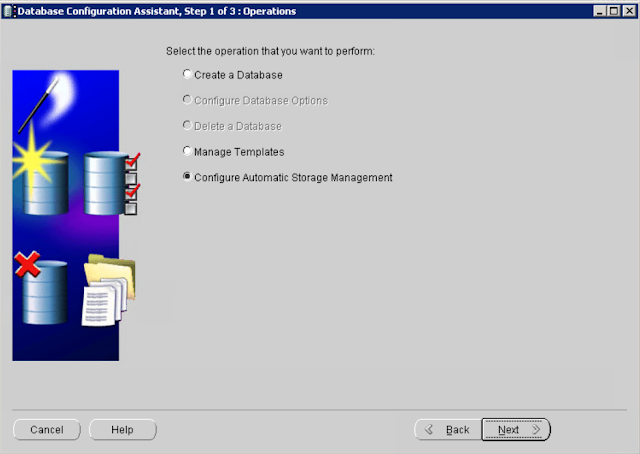
While migrating from file system to ASM, we
create ASM instance on the current host before we could stamp the disks and
create asm diskgroups to migrate existing datafiles from the file system to the
ASM. Before we create/start ASM instance, we need to start “Oracle Cluster
Synchronization Service” (CSS). So, we initiate “dbca” to create/start ASM
instance as a first step. If you are using Windows, invoke dbca application
using right click and “Run as Administrator”.
Open a new command prompt by initiating with “Run as Administrator” option, and execute
Select “Configure
Automatic Storage Management”, and click Next. We see a popup dialoged box that
asks us to run “$ORACLE_HOME/bin/localconfig add” command.
Open a new command prompt by initiating with “Run as Administrator” option, and execute
“localconfig add” (For failed configuration, we can also execute “localconfid
reset”, or “localconfig delete”)
C:\Windows\system32>d:\oracle\1020\database\bin\localconfig
add
Step 1:
creating new OCR repository
Successfully accumulated necessary OCR keys.
Creating OCR keys for user 'mydomain\myuser', privgrp
''..
OCR create keys failed, OCR error 5.
clscfg
failures to initialize ocr with ret(5)
failed to
create OCR repository
|
As you see it failed
with error “OCR create keys failed, OCR error 5”. I solved this problem by
making my logged in use part of Administrator and ORA_DBA OS groups on my
Windows server. If you are already logged in as Oracle software owner, you
should not face this problem (remember to open command prompt as “Run as
administrator”.
Following is successful
execution of this command.
C:\Windows\system32>d:\oracle\1020\database\bin\localconfig
delete
Step 1:
stopping local CSS stack
Step 2:
deleting OCR repository
successfully deleted local CSS setup
C:\Windows\system32>d:\oracle\1020\database\bin\localconfig
add
Step 1:
creating new OCR repository
Successfully accumulated necessary OCR keys.
Creating OCR keys for user 'mydomain\myuser',
privgrp ''..
Operation successful.
Step 2:
creating new CSS service
successfully created local CSS service
successfully added CSS to home
|
Once CSS starts
successfully, you should be able to see the service in ”services” panel.
Close the popup
dialogue box by clicking OK button, and click next. On next screen, provide
password for Sys user of ASM and click next.
ASM Instance would get
created and you should be able to see ASM instance service running from
“services” panel.
Now you can start attaching you disks to the
server and then stamp the disks and creating ASM disk groups.


No comments:
Post a Comment